Your First Customizer
Build a name engraving customizer with Text Input, configure its preview, and check the saved selections and order details.
Last updated: 2026-11-06
Follow the name engraving example below to build and check your first customizer from start to finish. Templates, other option types, and conditional logic are covered afterwards under More Ways to Build.
Choose a Product
Start with one Shopify product and a clear personalization task, such as adding a name to a pendant. Keep stock choices such as size or metal type in Shopify variants; use Podifai for the engraving text. See Shopify Variants vs Podifai Options if you are unsure where a choice belongs.
- Open Products in Podifai and find the Shopify product.
- Click Add Options, then choose a template or create the option set from scratch.
- If the product already has options, click Edit Options to open its existing option set.
Then follow the engraving example below, and use the verification checklist before launch.
Complete Example: A Name Engraving
This example uses one Text Input on a pendant. The sample limit of 12 characters is a starting point for this exercise; choose a limit that your actual engraving area and production process can support.
- Add a Text Input and set its label to Engraving text. Add help text such as "Enter up to 12 characters."
- Turn on Required if every purchase needs engraving. Turn on Allow Character Limit and set Max character to 12.
- Choose a preview background that shows the engraving area. For this example, choose Custom image and upload a prepared pendant image.
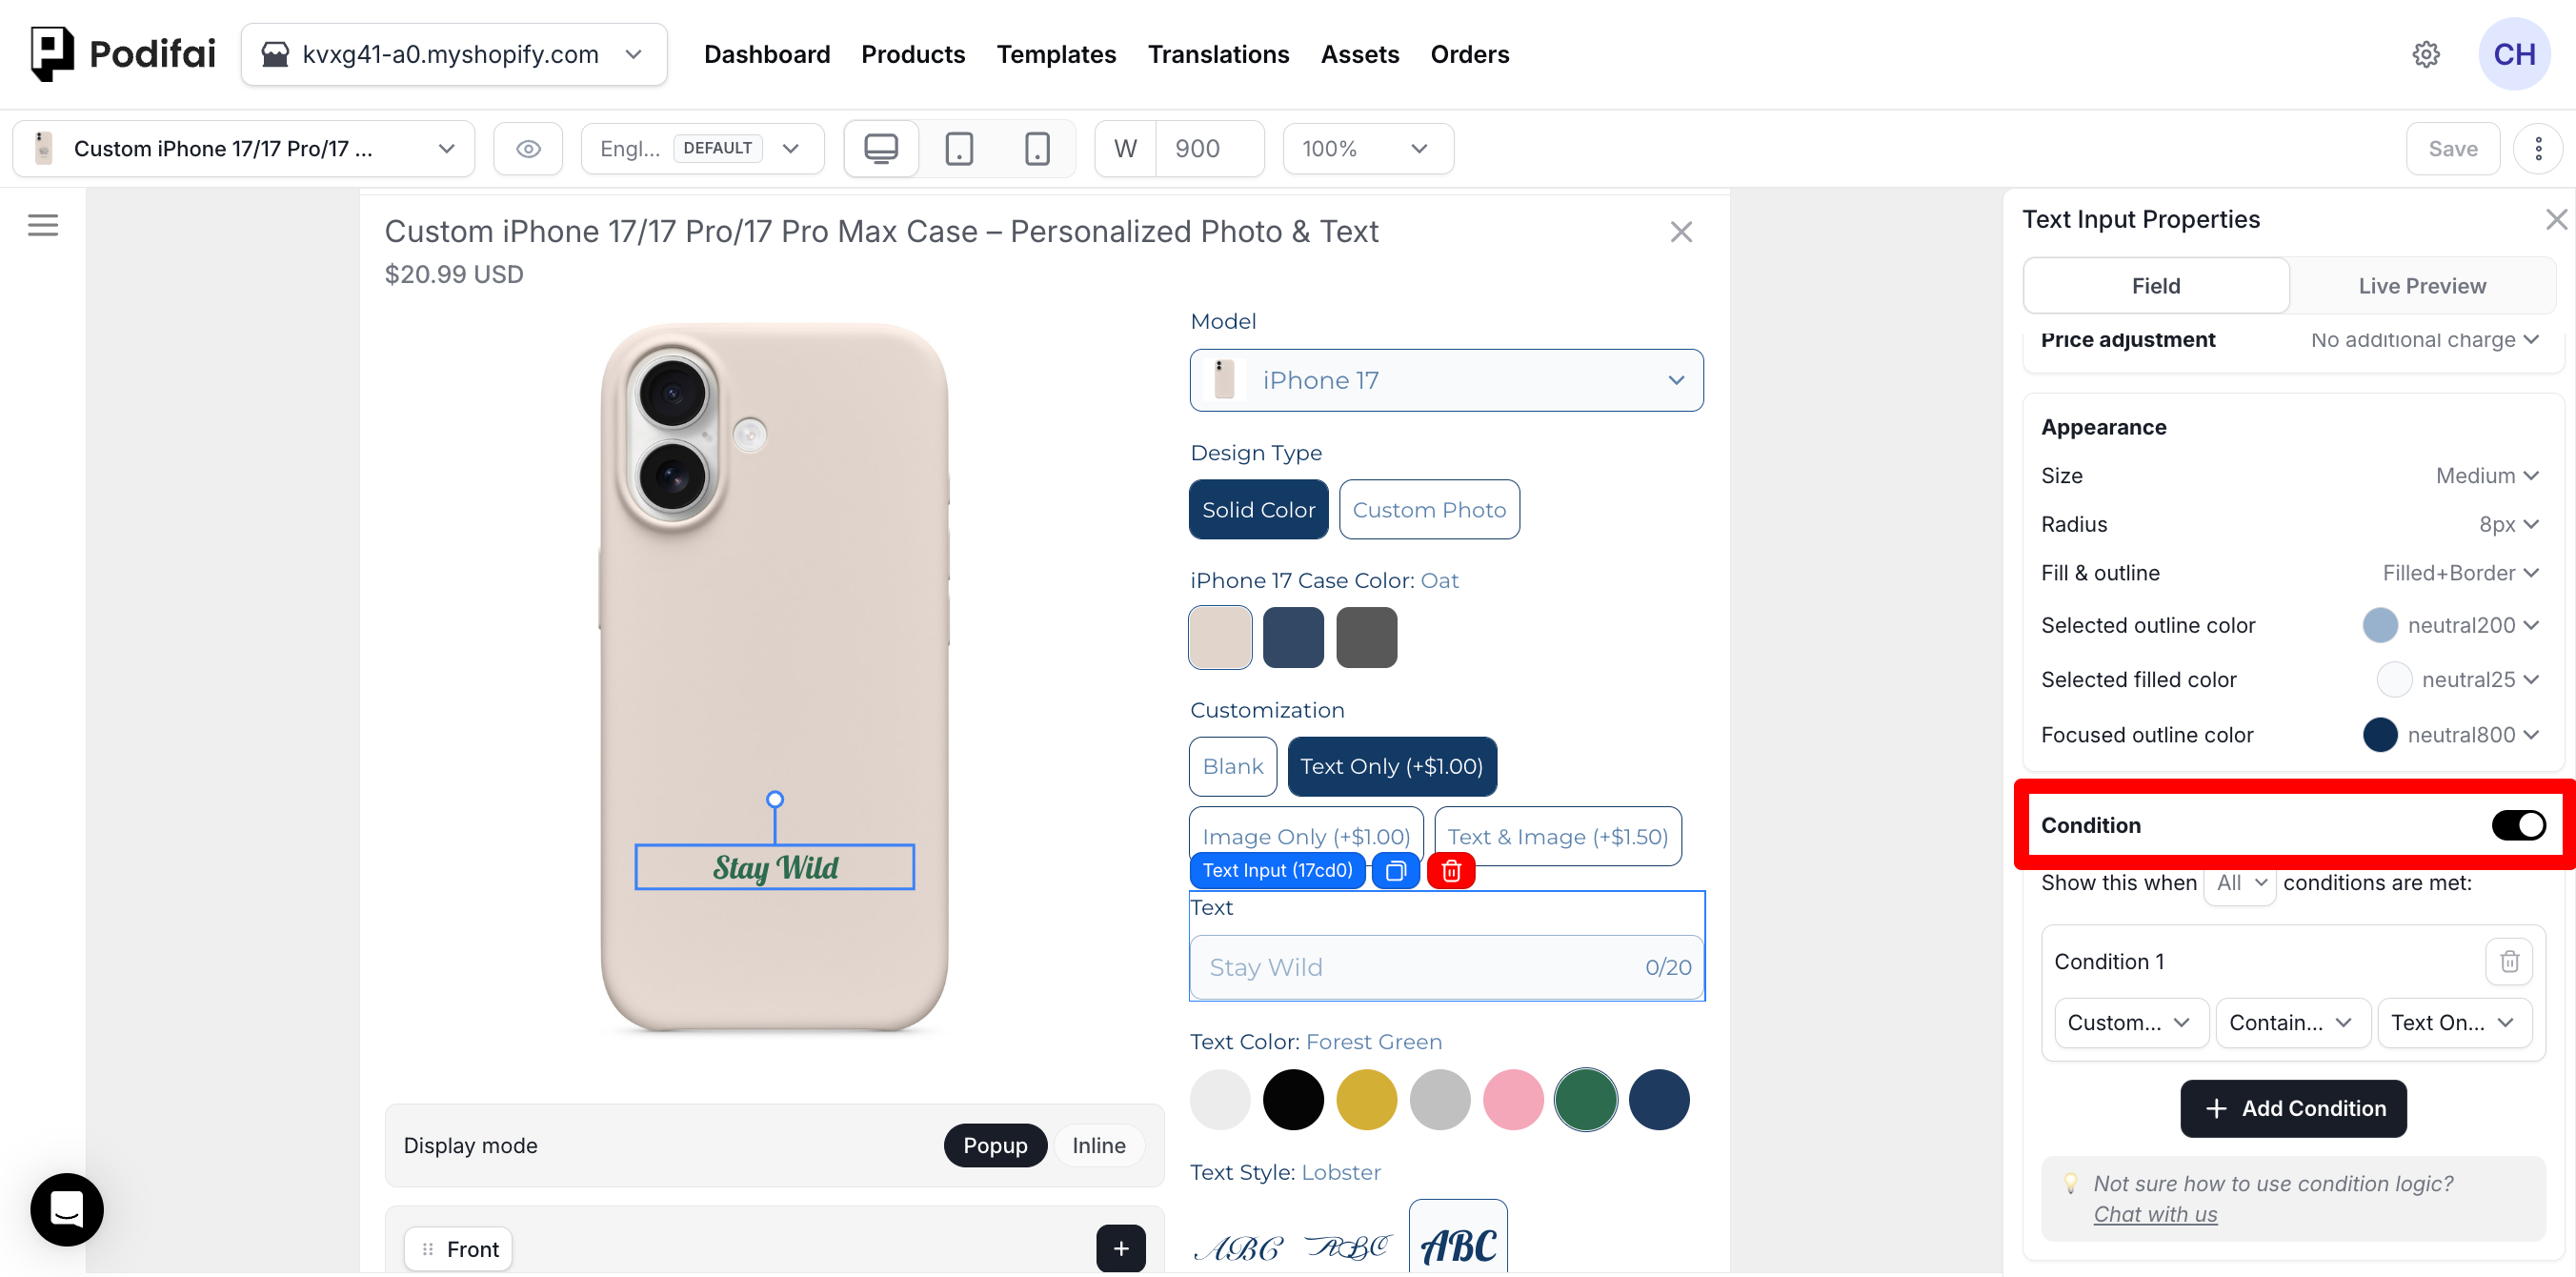
- Enable Live Preview for the Text Input. Select the text layer, move it onto the pendant, and adjust its font, size, and alignment. Use fixed text width and automatic resizing if the text should fit a defined preview area.
- Optionally add a fixed engraving charge, such as 5 in your store currency, using the text option's price adjustment. See Dynamic Pricing for setup. The Text Input adjustment applies when the shopper fills in the field.
- Click Save, then complete the storefront setup and checks below.
Save and Enable on the Storefront
Click Save in the Podifai editor. Then follow Enable App Embed to load Podifai in the Shopify theme you will use. If you need a specific placement in the product template, follow the App Block setup instead. Open the product page in that theme to test the customer flow.
Verify Before Launch
- Field: Confirm that the engraving label, help text, and input appear on desktop and mobile.
- Validation: If the field is required, leave it empty and try adding to cart. Then enter 12 characters and try a 13th to check the configured limit.
- Preview: Test a short name and maximum-length text. Check that the text remains readable and inside the intended engraving area.
- Variants: If the product has Shopify variants, switch between them and check the engraving placement for each one. To make the background follow the selected variant, see Variant image setup.
- Price: If you added a charge, check that the product page, cart, and checkout include the expected engraving charge. Account for any discounts, taxes, and shipping when comparing totals.
- Order: Complete a test purchase using your store's testing process. Confirm the exact engraving text on the Shopify order and in Podifai Orders.
If the options do not appear, start with Troubleshooting. For the next setup, explore Font Swatch for shopper-selected fonts or Multiple Views for separate product sides.
More Ways to Build
Start from a template, add other option types, or add conditional logic once your first customizer works.
Create from a Template
Templates are the fastest way to see how a complete setup works. Pick a template close to your product, apply it, then review how the option types, labels, values, and preview settings are arranged. You can start from a Podifai-provided template or from a custom template saved in My Templates.
Create from Scratch
If you start from scratch, open a product customizer and add only the option types your product needs. A simple setup might combine visual choices, typed personalization, and customer uploads.
Example: Image Swatch
Use Image Swatch when shoppers should choose from visual values like colors, materials, patterns, or product images.
Example: Text Input
Use Text Input for names, initials, dates, engraving text, or any short customer-entered value.
Example: Image Upload
Use Image Upload when shoppers need to upload a logo, photo, artwork, or reference image. You can make the upload required, add help text, and optionally charge a fixed upload fee.
Follow Image Upload for the upload field's settings and preview controls. For shopper adjustments, see the Storefront Image Editor.
Enable Live Preview When Needed
For supported options, turn on Live Preview so shoppers can see the customization on the product image before checkout.
If an option should only collect a customer choice, you can use it without Live Preview. Follow the option-only setup steps; the shopper's value will still be saved with the order.
Add Conditional Logic (Optional)
Use Conditional Logic when one option should only appear after another choice. For example, show an upload field only when the shopper selects "Custom artwork".
Example: Combine two display conditions
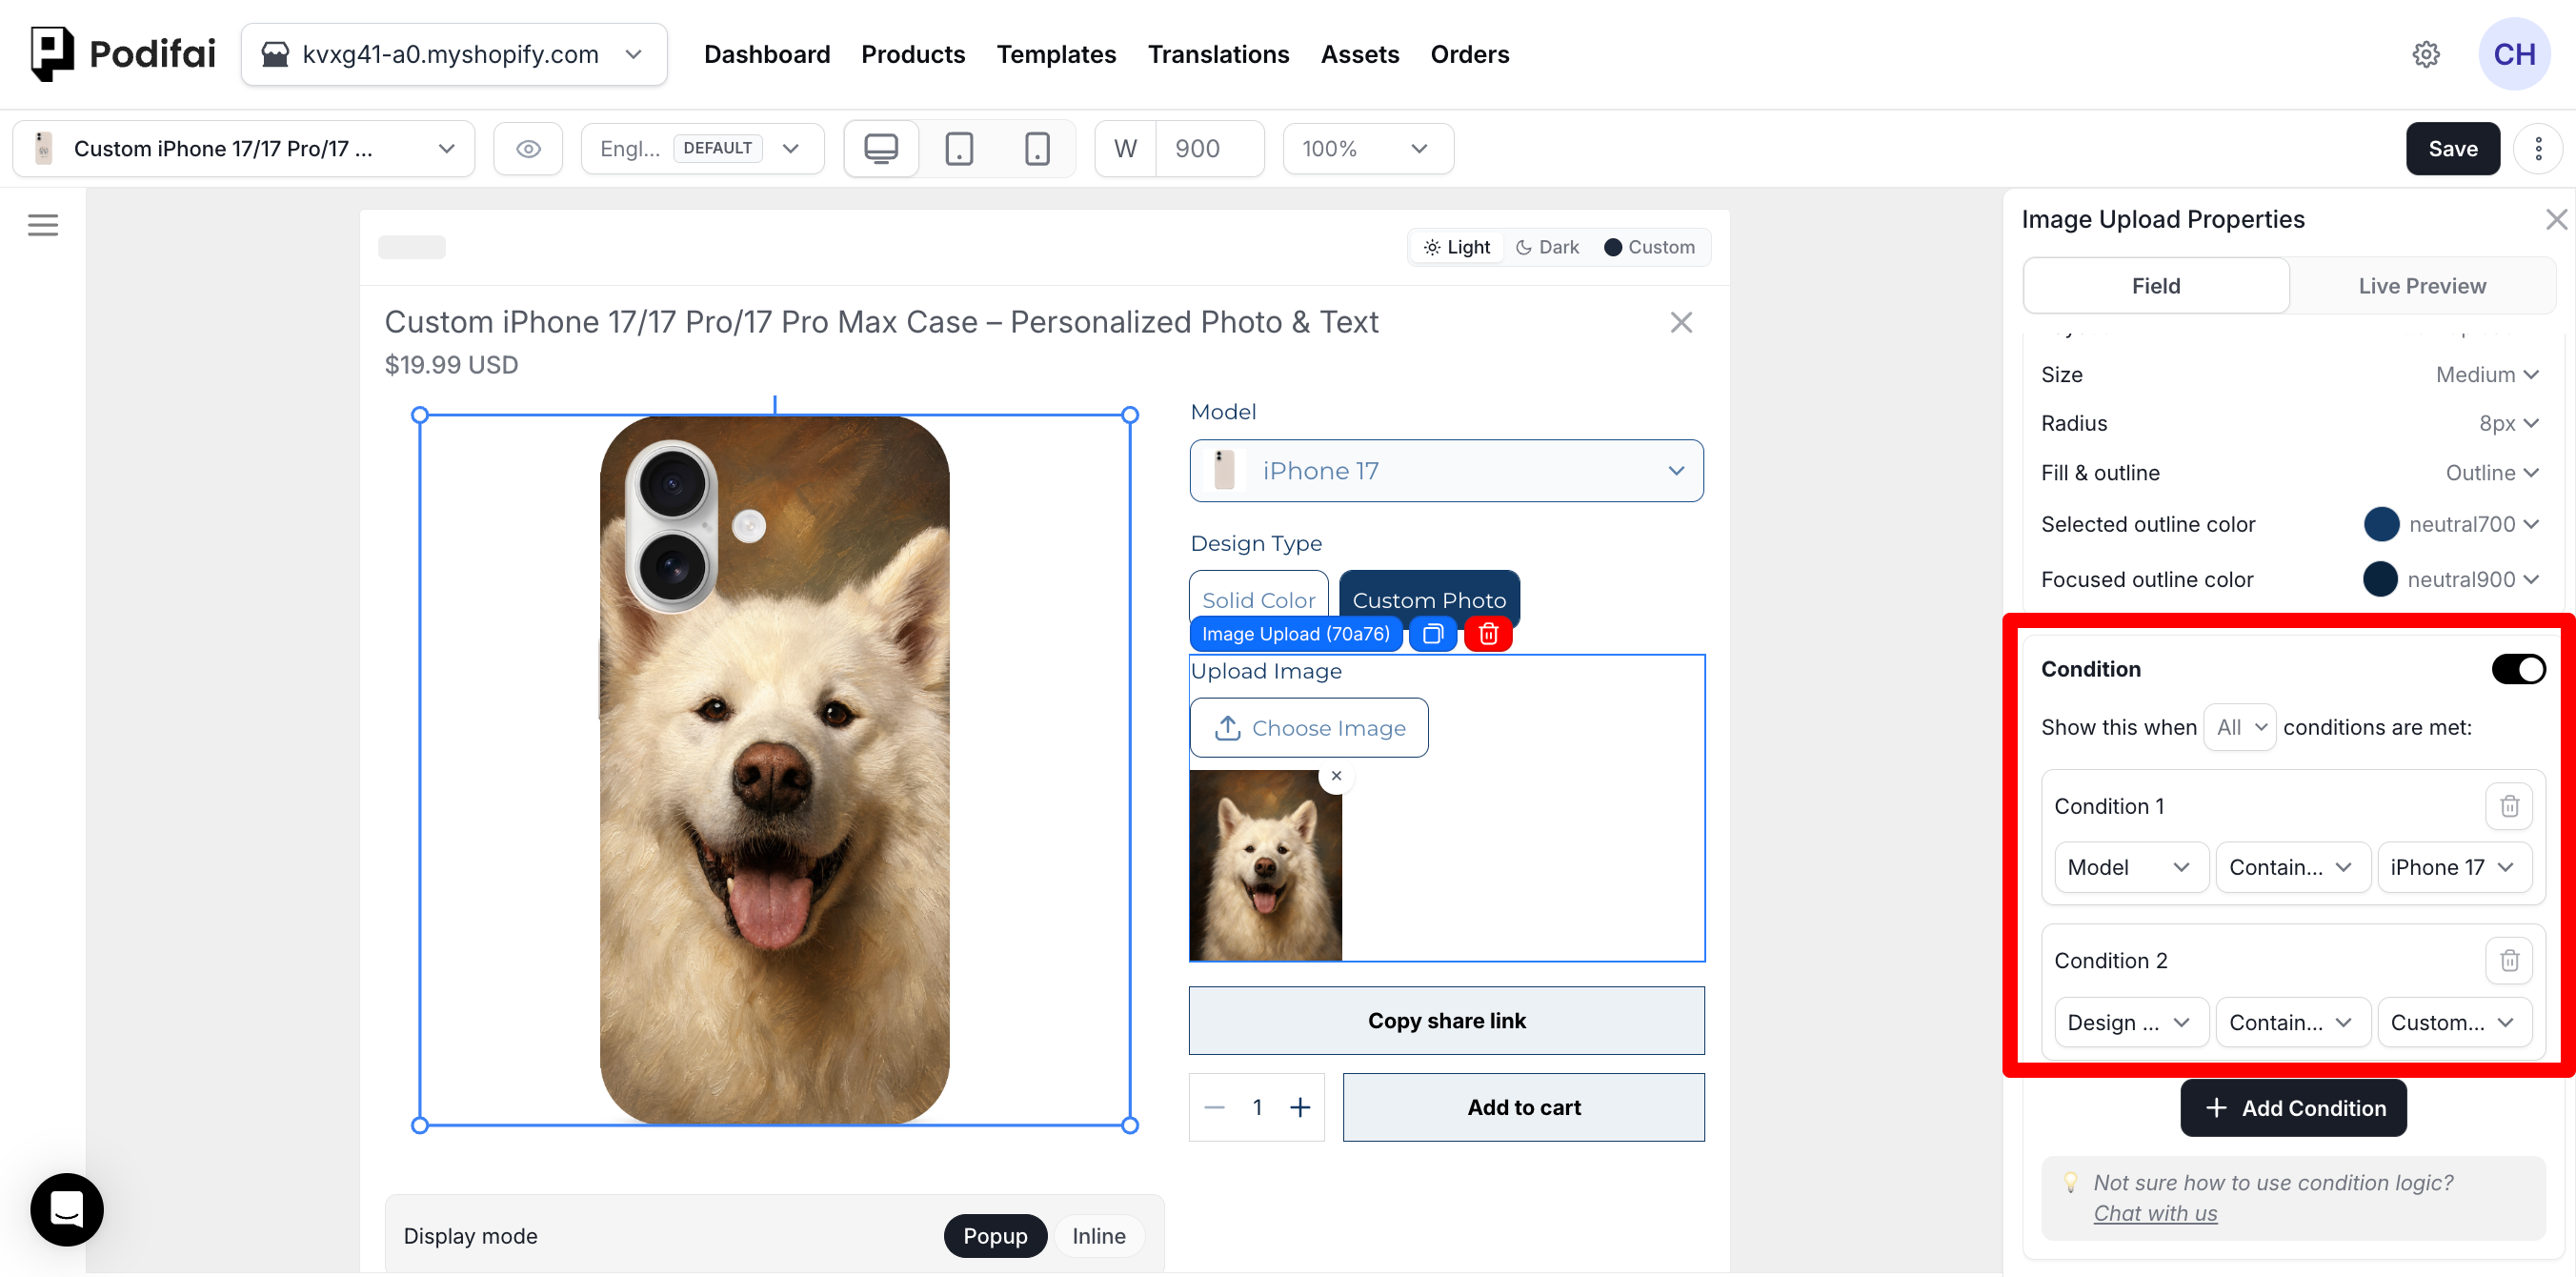
Set up a conditional logic rule