
Connect Your Store
Find your myshopify.com store handle, authorize Podifai, and check that you connected the intended Shopify store.
Last updated: 2026-11-06
Overview
After installing Podifai, connect it to your Shopify store. Podifai opens inside your Shopify admin and asks for your Shopify store handle so it can start the Shopify authorization flow.
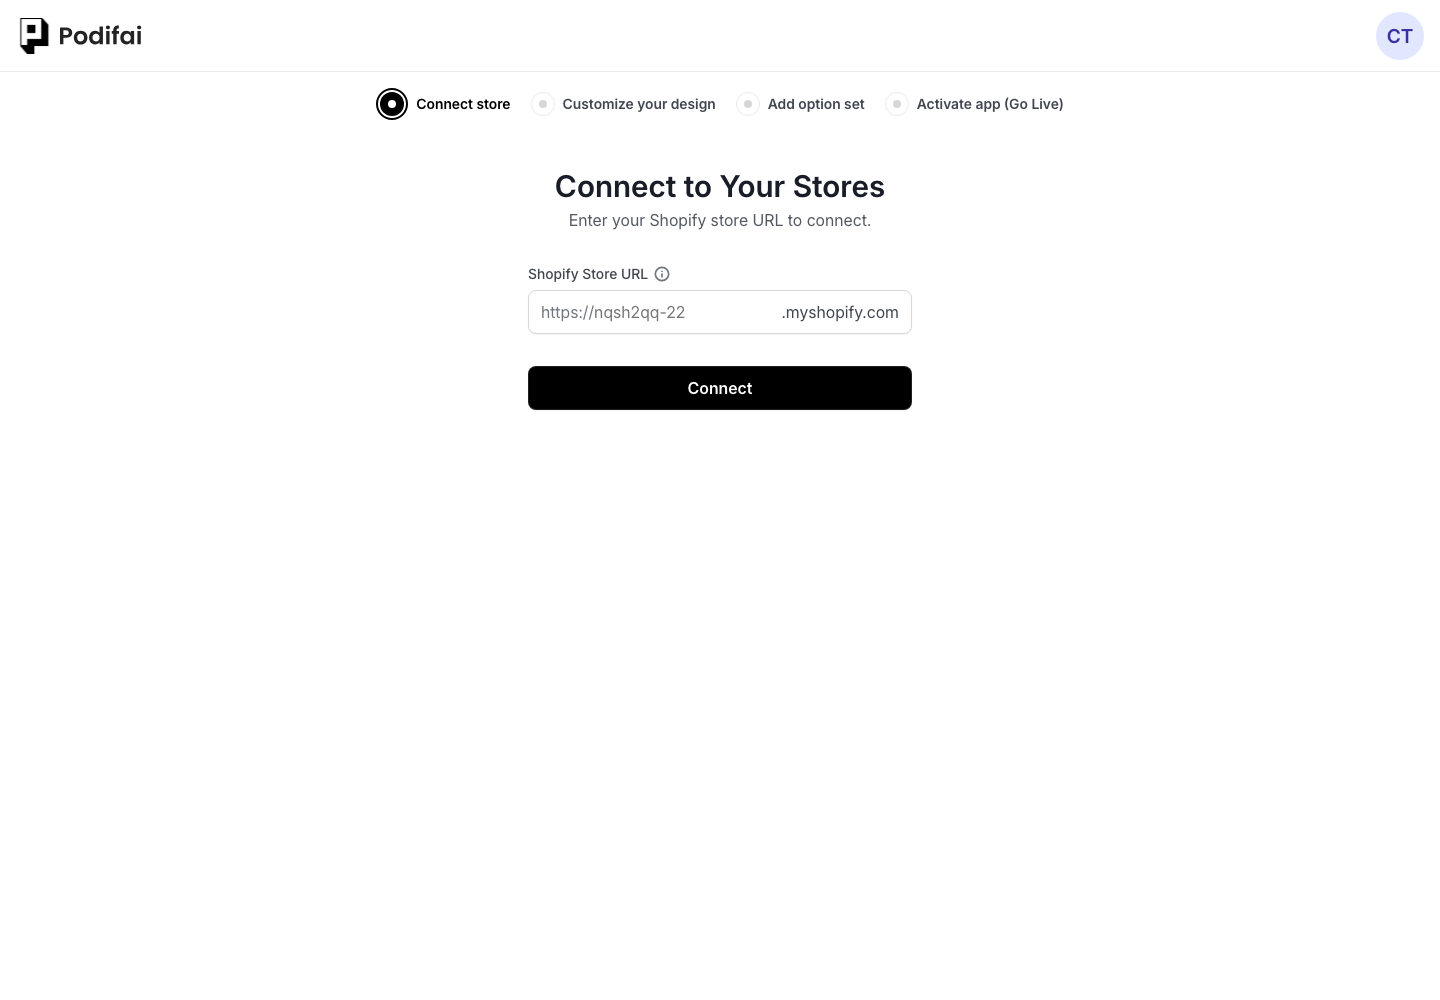
How to Connect
- In your Shopify admin, go to Apps and click Podifai.
- Podifai opens and prompts you to enter your Shopify store handle.
- Enter only the handle from your myshopify.com address. For
my-store.myshopify.com, entermy-store. - Click Connect. Podifai redirects through Shopify authorization and then syncs your products.
How to Find Your myshopify.com URL
Shopify assigns every store a unique myshopify.com domain. This domain is used to identify the store and appears in the Shopify admin URL, even if customers usually visit your store through a custom domain such as shop.example.com. Podifai needs the store handle from this myshopify.com domain; a custom storefront domain will not work here.
If you are already in Shopify admin
Check the browser address bar while you are logged in to Shopify admin. The URL usually includes admin.shopify.com/store/your-store-name. Copy only the store handle after /store/, then enter that handle in Podifai.
If your storefront uses a custom domain
A custom domain can be the public URL customers see, but Shopify still keeps the store's myshopify.com domain in the admin domain settings. Go to Settings, then Domains, and find the myshopify.com domain listed for the store.
As a rule, enter only the handle before .myshopify.com:
- For
sample-store.myshopify.com, entersample-store. - For
admin.shopify.com/store/sample-store, entersample-store.
What Podifai Accesses
- Products — Read product titles, images, and variants to power the option editor
- Orders — Attach customization data (selected options, uploaded images) to each order
- Theme app extensions — Display product options on your storefront via the app embed
This is a summary. Shopify shows the exact access list on its approval screen when you install. Podifai also installs a Cart Transform function that applies add-on prices at checkout; see Managing Orders.
Check the Connected Store
- Confirm that the store handle you entered belongs to the Shopify store you intend to configure.
- Complete the Shopify authorization flow, then open Products in Podifai.
- Find a known product from that store and open Add Options, or Edit if it already has an option set.
If the connection does not complete, compare the entered handle with the store's myshopify.com domain in Settings → Domains. Enter only the part before .myshopify.com. If the issue persists, also check that you are logged in to the Shopify account that owns the store, and that you are using the store's myshopify.com handle, not a custom domain. If the issue persists, send support the store URL, the step that failed, and the displayed error through Contact Us.
Next Step
Once connected, add options to your products. You can optionally turn on Live Preview for supported option types during this step.
For a complete example, follow Your First Customizer. Store connection and storefront theme activation are separate steps; complete the App Embed or App Block setup after saving the product options.